
Marble bathroom rendering goes wrong in three places: the veining is at the wrong scale, the polish is too perfect, and the reflections show things nobody planned for. Get those three right and a bathroom can look photographed. Get one wrong and the whole room reads as a showroom mock-up, even when the model, the light and the camera are fine.
I render a lot of bathrooms, and stone is where most of my hours on them go.
Why marble is harder than tile, timber or paint
Paint has no pattern. Timber has a pattern, but people forgive it because every plank is different anyway. Marble is the awkward middle: a large, directional, one-off pattern that your eye follows across the whole wall, on a surface glossy enough to mirror the room back at you. Any shortcut shows.
It's also the most expensive finish in the room, which means the client looks at it hardest. In a bathroom image, the stone is the product.
Veining: scale first, then direction
The most common mistake I see in marble renders is a beautiful texture mapped at the wrong size. A photographed slab is typically around 3 m by 1.8 m. If that picture gets squeezed onto a 60 cm tile, the veins turn into fine scribbles and the wall looks like printed laminate. Stretch a small sample over a full-height wall and the veins become rivers a hand wide, and it reads as wallpaper.
So before anything else I ask what the stone physically is. Full slabs? Large-format porcelain at 120 by 240 cm or 60 by 120 cm? Small tiles? The answer decides how the texture is laid out, because each of those is built differently on site and should be built the same way in the model.
With real slabs, I map one slab image per slab, at true size, and cut the wall into pieces the way a fabricator would. With marble-look porcelain I do something else. A porcelain series is printed with a limited set of different faces, and tilers shuffle and rotate them, so I offset and flip the texture per tile and model a 2 mm grout joint with a slightly bevelled edge on each tile. That small dark line every 60 or 120 cm is what tells the viewer how big the room is.
Direction is the second thing. Veins that run diagonally on one wall and horizontally on the next look careless unless it's a deliberate design. On a vanity with a mitred waterfall end, the veins should flow over the edge and continue down the side, as they would if one slab had been cut and folded. And where two slabs meet in a bookmatch, the second one is a mirror image of the first, so the veins form a symmetrical butterfly at the joint. Bookmatching in a render takes five minutes and a mirrored texture. It's the detail that makes stone suppliers nod.
Repetition is the last check. If the same distinctive vein shows up twice in one frame, the eye finds it within seconds.
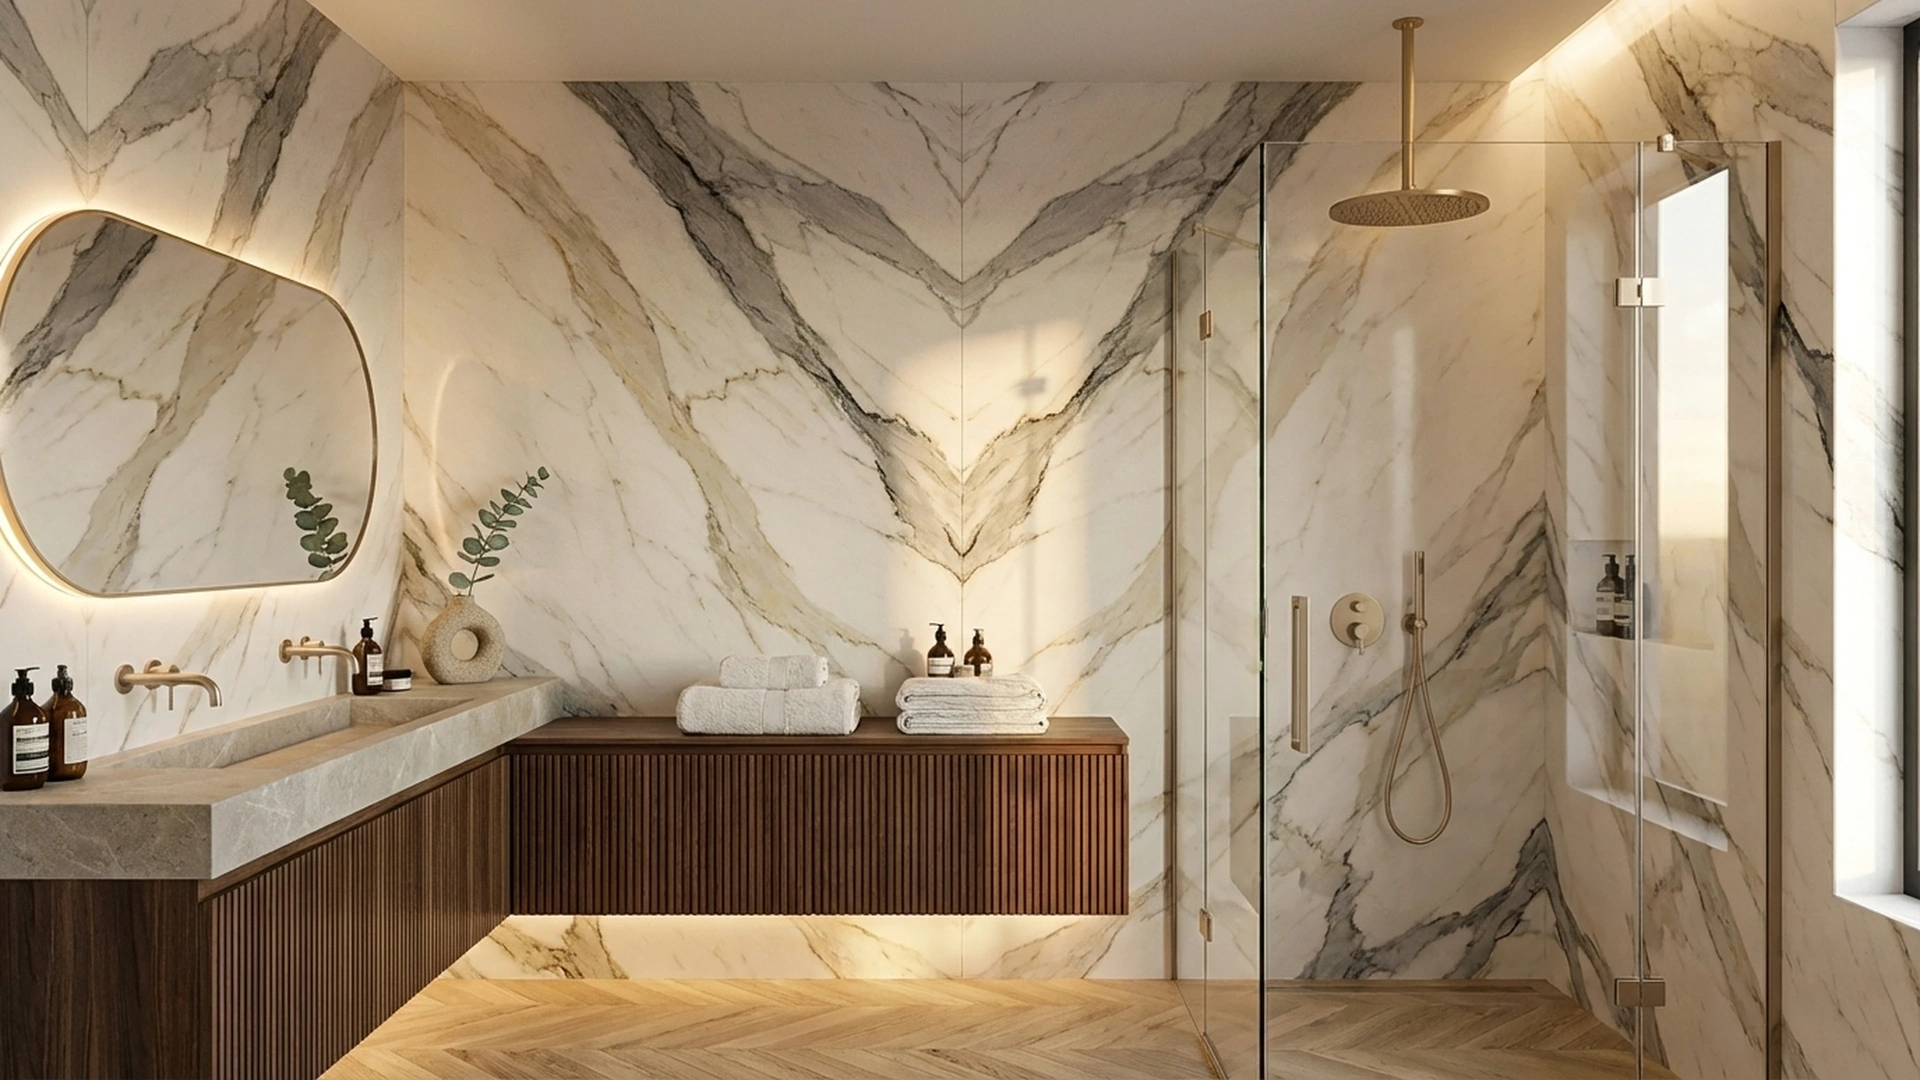
Polish: real stone is never a perfect mirror
Polished marble is very glossy. In Blender's Principled shader that's a roughness of roughly 0.05 to 0.1, with an index of refraction around 1.5. Honed marble, the matt finish that's more common on floors because it's less slippery, sits nearer 0.25 to 0.4.
Should the value be the same across the whole surface? No, and this is where a render either turns into a photo or stays a render.
A real polished wall has been wiped, splashed and touched. I add a faint roughness map on top of the base value: broad soft smears, a few water marks near the basin and the bath, almost nothing above shoulder height. The strength is low, something like plus or minus 0.03. You shouldn't be able to see it when you look straight at the wall. You see it where a window or a lamp reflects, because the reflection breaks up slightly, and that's exactly what happens in a real bathroom at seven in the morning.
Here's the part people get backwards. They add a bump map made from the vein pattern, thinking it gives the stone depth. Polished marble is flat. The veins are colour inside the stone, not grooves on it, and a bumped vein catches light like a crack. I leave bump off entirely for polished finishes and use only a very light one for honed or brushed stone.
White marble is also slightly translucent, which is why Carrara looks soft where plaster looks chalky. In close-ups of a basin edge or a backlit niche I'll add a little subsurface scattering with a radius of a few millimetres. In a wide shot of the room it changes nothing you can see and adds noise, so I leave it out.
Reflections: the room behind the camera matters
A marble bathroom is a box of mirrors. Polished floor, polished walls, an actual mirror, a glass shower screen, chrome taps. Every one of them reflects the parts of the room that aren't in the picture.
That has a practical consequence: I have to build what's behind the camera. If the model stops at the edge of the frame, the stone reflects an empty void, and a glossy wall goes dark and dead in a way that's hard to diagnose if you don't know to look for it. The wall behind the viewer, the door, the ceiling and at least a plain version of the adjoining room all need to exist, with sensible colours, because they're in the image whether the camera points at them or not.
Lights are the next problem. A row of small ceiling downlights reflects in a polished floor as a row of hard white dots, and in black marble those dots are the brightest thing in the frame. I keep the visible fitting but light the room with larger, softer sources just above it, so the reflections are gentle pools and not pinpricks. The mirror needs the same care. I check what it shows from the chosen angle before spending any time on materials, since a mirror that reflects a blank wall wastes a third of the picture and one that reflects the window can make it.
Then there's noise. Glossy surfaces bouncing light into other glossy surfaces through glass is the slowest thing a path tracer does. My ordinary interiors render clean at around 800 samples with denoising, and a marble bathroom usually needs 1,500 to 2,500 before the dark reflections stop crawling. At 4,000 pixels wide that's roughly 40 to 70 minutes per image on my machine, about double a living room. I also turn off caustics through the shower glass, because the fireflies they produce cost far more than the effect is worth at this scale.
Black marble and white marble fail in opposite ways
Dark stone such as Nero Marquina behaves like a tinted mirror. It shows every reflection at full strength, so the lighting and the off-camera room have to be right, and any remaining noise is visible. I give black marble images the highest sample counts and the most time.
White stone has the opposite problem: it burns out. If the base colour is set to pure white, sunlit areas clip and the veining vanishes into a blank patch. I keep the brightest part of a white marble texture at about 80 percent, which leaves room for highlights and keeps the grey veins readable in direct light.
The two can share a room, and often do. The spa bathroom study on this site is a good example of dark stone against pale timber, and it's the kind of contrast that needs careful exposure.
What I ask for before I start
A stone name isn't enough. Last spring a client sent me a bathroom brief with one word for the walls: Calacatta. I rendered a classic version, white ground with bold grey and gold veins. The slab they'd actually reserved at the yard was much quieter, almost plain, with two thin veins across three metres. It took one revision round to correct, and it would have taken none with a phone photo.
So this is my list now, and it's short:
- A straight-on photo of the actual slab or the tile series, ideally with a tape measure in the frame.
- The format: slab, or tile size in centimetres.
- The finish: polished, honed or brushed.
- Where joints fall, if the designer has drawn them.
If the stone hasn't been chosen yet, that's fine too. I'll propose two options and we fix one before the final render. I've written more about what works as a reference in the article on material samples for renders.
What I'd actually do with a limited budget
Spend it on one very good angle.
A marble bathroom doesn't need four views. It needs one wide shot from the door that shows the stone, the vanity and the light, and perhaps one closer view of the basin or the bath where the polish and the veining can be seen properly. Two strong images sell the room better than five average ones, and the close-up is where all the work on roughness and vein direction pays off.
I'd also choose morning or late-afternoon light over flat midday. Low light rakes across the stone, pulls long reflections over the floor and shows the polish. Evening scenes with only artificial light look dramatic, but they're the hardest to keep clean on dark marble and they hide the veining the client paid for.
My interior rendering services start from EUR 250 per camera angle with two consolidated revision rounds included, and the first preview normally arrives about three business days after a complete brief. There are more bathrooms and stone finishes in the portfolio, and the full list is on the architectural rendering prices page. If you've got drawings and a slab photo, send them through the quote form and I'll come back with a non-binding price and an honest note on which angles are worth rendering.